
Ranking
Variety of Design: Very good. Par 3's have solid variety in the middle and lower ends of the spectrum, only lacking a long hole. Par 4's are also greatly varied, from driveable to over 450 yards. And the par 5's all have strategic interest, with holes 1 and 13 potentially being full 3 shot holes depending on manner of play. For directional variety, the course has 7 holes playing to the left, 5 holes playing to the right, and 8 holes playing straight; 1 hole can be played either straight or as dogleg left and 1 is a double-dogleg, so numbers don't add to 18. 8 out of 10
Flow of the Course: One drawback to the course's originality is that it can provide a visual overload for the player. The blind shots, massively contoured greens, hazards, and such does a bit to take away from the flow of the course. The player is at something of a high point for the entire round. It does flow from the point of view of shot types, but never builds to that "big finish." 6 1/2 out of 10
Conditioning: Good. While it was nothing spectacular, the conditioning was on the same level as the comparable courses in the area, which was very good. 7 1/2 out of 10
Ease of Walking: Difficult. The course can be walked, and the course does allow it, but it is not easy. Some of the holes are spread out, many of the holes have substantial hills, and the summer temperatures (if you decide to play during that time) are oppressive. 5 out of 10
Atmosphere: There is no country club aura here. This place is a golf club, plain and simple. There will likely be some level of anticipation for the golfer playing here, but overall, this is just an average club. 4 out of 10
Total: 67.5
Holes to Note
*Note* On this review, the holes to note will be a more detailed description of those holes mentioned as CB Macdonald Template Holes in THIS article, with two additional holes.
All images taken by and used with permission from The Buffalo Golfer
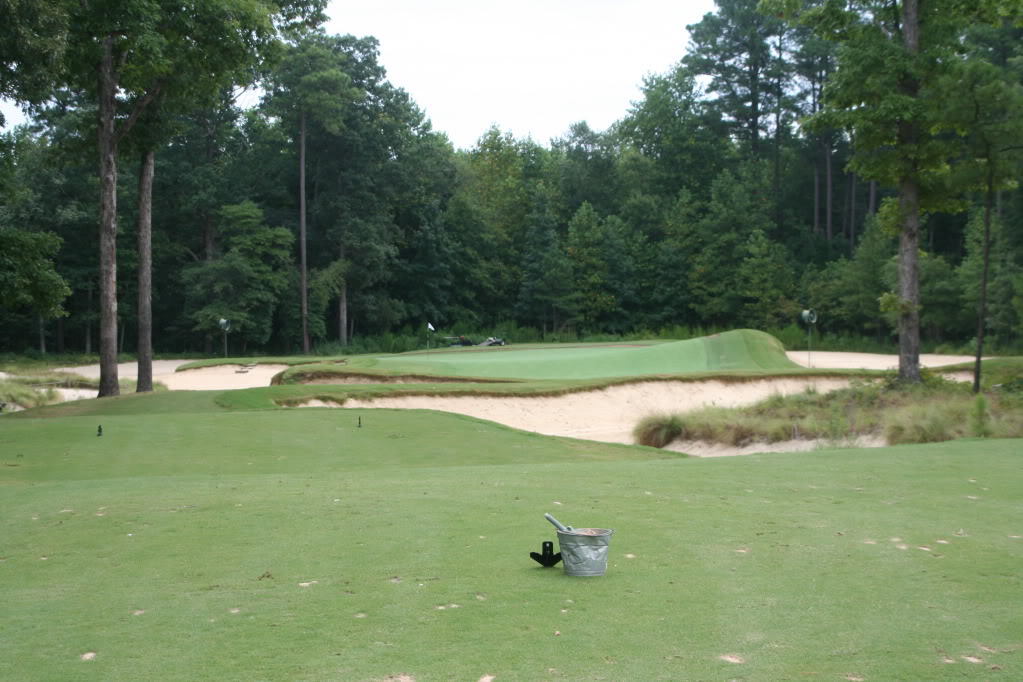
Hole #1: Par 5, 558 yards
This is the Alps hole of the course. In fact, it is something of a Double Alps hole given that the tee shot must be played over a mound to a blind fairway, as must either the second or third shot, depending on hoe one chooses to play. The large hills flanking the fairway determine play. A conservative golfer can play out to the visible fairway off the tee and then lay short of the hills on the second shot, leaving a mid-iron to the green, or he can play directly over the left hill and then play over the center of the mounds for his second shot, leaving 50 yards or so to the green. This is one of the most visually intimidating first holes you will ever play and certainly not a "gentle handshake" to start the round...more like a handshake twisted into a chokehold.

From the tee, the player is confronted with two giant mounds. The hills in the distance are reachable from the tee for longer players. Those players must play to the left over hill to a blind fairway.

From the center of the fairway, the player is confronted with another blind shot. From here, the player can lay short of the hills or go over them. The green is located on a line opposite the sandy area on the hill in the background.

From the left side of the fairway, the approach to the green is obscured by this set of bunkers.
Hole #2: Par 4, 377 yards
This hole bears similarity to the Road Hole template. Certainly the length is 'wrong' but the characteristics of play are quite similar. From the tee (where the shot in general resembles the Sahara), the player is given two options, play safely out to the left to the flat portion of the fairway, or play to the right, blindly over the large hills that guard that side of the fairway. Not all that dissimilar to playing over the hotel. From the fairway, the player who played to the left will be hitting a middle iron into the green, the player hitting to the right will be left with a pitching wedge or perhaps less (oddly enough, those are the same clubs used by tour pro's on the real Road Hole these days). Into the green the player is confronted with a deep scar bunker directly centered on the green waiting like a magnet to collect balls and the green is guarded long by a sharp drop-off to a bunker and brushy waste area.

The safe line off the tee is to play a bit right of the left tee marker visible here. The aggressive line is over the right tee marker, or even a bit right of that. This is the blind Road Hole tee shot.

Into the green, the player can play a draw to the green, but must avoid the bunker centered on the green. Players going long will be confronted with a shot from a deep, vertically faced bunker.
This green, having a mostly flat area in front, a depression in the center, and flat plateau in the rear strikingly resembles the Biarritz green complex. The length of the hole prevents the rolling approach in most cases, but that does not take away from the green having the necessary form.
The flat front level, the center depression, and the back tier can be seen here. The back is elevated slightly above the front on this green and the right side is elevated allowing balls to run back.
This is a template hole, but not of the Macdonald School. Mike Strantz started out working for Tom Fazio. Many of Fazio's designs have this basic hole form. The Quarry, Boomerang, Fishhook (my choice), whatever you want to call it, these holes all offer the player to play two aggressive shots and reach the green in two shots. On this particular hole, the player needs to play his tee shot down the left side of the fairway in order to have a reasonable shot to the green in two shots. Then he must play his second over a sandy waste area that butts up to the green on the left side and long.
From the tee, the shot should be played as close as possible to the bunker down the left if the player wants to go for the green in two.

This is the shot facing the player who chooses to go for the green in two shots. Not visible here is the run-up area that the player can use if playing slightly out to the right with a draw, roughly over the small bush that can be seen in the center of the image.
Hole #12: Par 4, 419 yards
The Cape hole. This hole gives the player the chance to play his shot out over the bunker down the left side as far as he wants. The fairway narrows down greatly at one point, but beyond that, there is enough room for any shot to land. The safe player can play straight down the fairway short of where it pinches in and then go to the green from there.
Standard Cape tee shot. The player can play short of where the fairway pinches at the trees, roughly 235 off the tee. The aggressive player can go left of those trees to however far left he is wishes to go.

This is the shot to the green for the player hitting short of the trees. As you can see, the bunker gets deeper the farther left the player goes off the tee.
This hole could be considered a Cape from the tee, but that is likely not visible to the player on the initial play. As it is, this hole is a Punchbowl due to the location of the green, though a case could be made for Alps as well. In some ways, this hole showcases everything that people find wrong with Tobacco Road. The Cape is a good hole. The Alps is a good hole. The Punchbowl is a good hole. Mixed together like they are here and it simply becomes too much for a player to take in within such a short span of time. As far as the hole goes, the simple, safe and common play is to go straight out off the tee to the large fairway, playing 220 +/- yards. The aggressive player can play out over the trees to the right at an angle of up to about 75 degrees from the front and be left with 150 yards or less to the green, assuming he hits a perfect shot. From the fairway, the player must pick a yardage to hit the second shot in order to leave himself with a preferred yardage into the green. The green is sunken inside a deep bowl and there is no possibility of a ground approach. This is not a bad hole, but it really just has too much going on, too many moving parts.

This is the view for the player playing out straight off the tee. The fairway runs out at roughly 240 yards from here. The aggressive player can try to go over the trees on the right, as mentioned above, anything up to about 75 degrees to the right of this view will be safe if played with enough length.

From the main fairway, the second shot should be played towards the silo in the distance. Anything left of that will be unplayable.

This the shot to the green. Unlike most Punchbowl greens, this one is bowled off in the front. Only the short walk path keeps the green from being completely surrounded. This shot is also taken from just forward of the tee shot location for those players going over the trees.

The Punchbowl green is clearly visible in this image. It would be a better Punchbowl is the love grass around the green was removed and replaced with a standard turf grass.
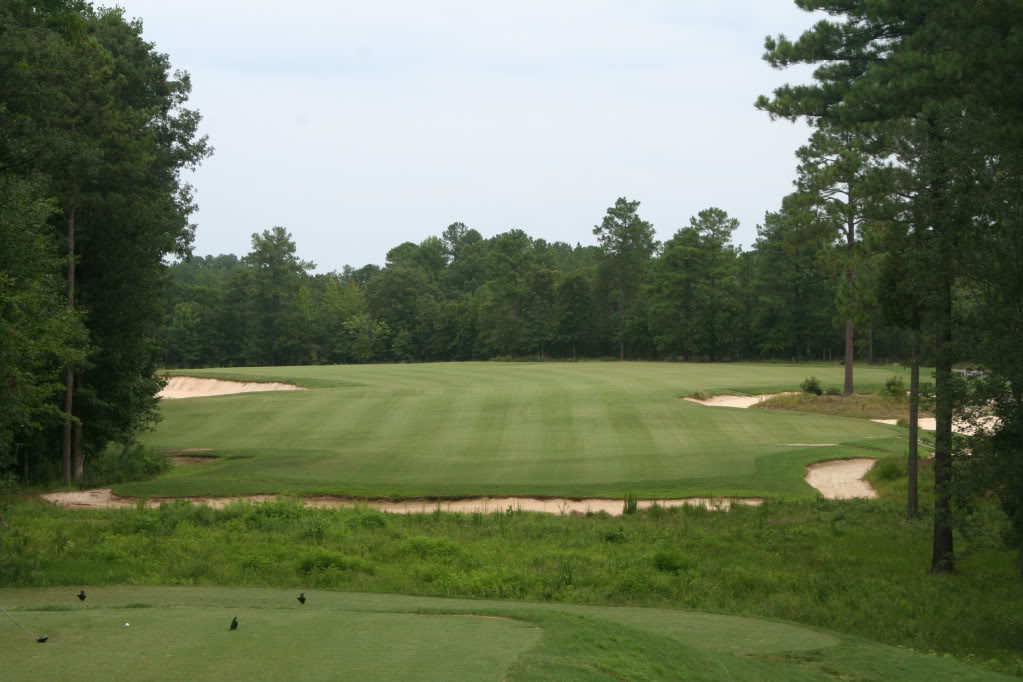
The tee shot plays over a massive sea of sand that rises up and obscures the fairway from view. The Sahara. This hole has more room than the player might think. Beyond the trees to the right, the fairway is very deep, extending perhaps 50 yards into the trees. But the best play is to favor the center of the fairway. Too far to the right will leave a significant distance to the green and too far to the left will almost certainly be a blind shot and may even be blocked out by trees. The green then gives players no easy finish being multi-tiered and sloping from front to back.

This is the Sahara tee shot. The shot must carry the sandy waste area and the cliff. Going down the center of the opening is the preferred line. Going over the trees may leave the player a shot, depending on how far right it is, but the shot will be longer.

This is the approach to the green. Even from the center of the fairway, the flag is obscured if placed back left like it is here.

The multi-tiered green slopes from front to back.
Overall, this is a very solid golf course. It does get a bit too extreme in spots, but typically walks the line between conservative and out-of-hand very well. Certainly this is a course that everyone should see at least once. You might love it, you might hate it, but you will certainly come out with some different thoughts on golf. 6 out of 10
No comments:
Post a Comment